Assembly and Decoration
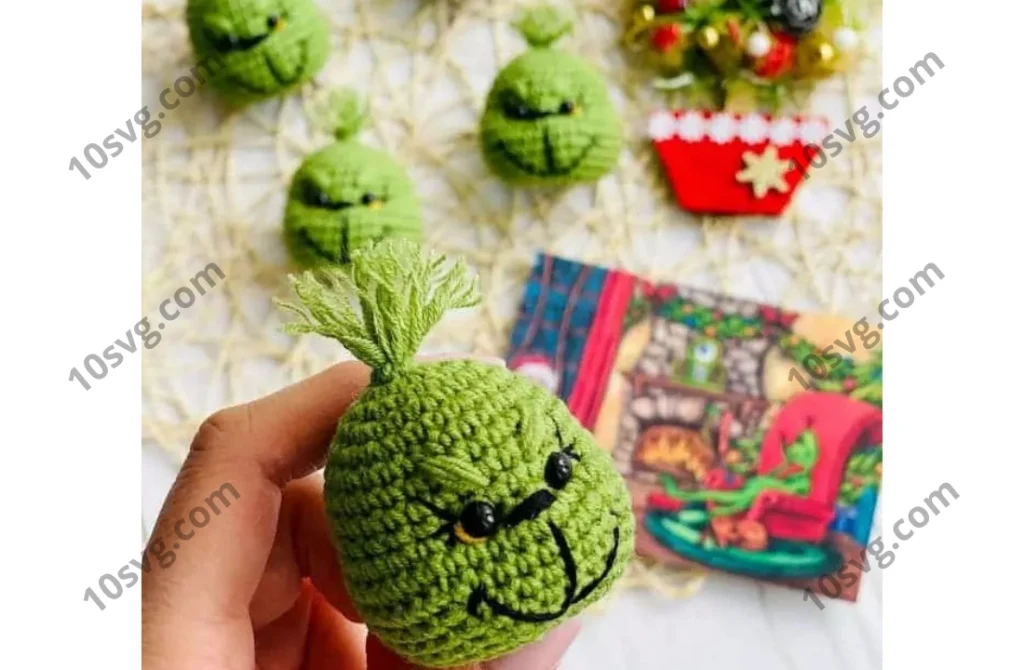
To create facial details, we need to do some shaping. Take a long needle with thread matching the yarn color of the head (Iris yarn). Secure the knot at the base of the head (where you finished crocheting) and thread it through the outer corner of one eye. Then, bring the needle out from the inner corner of the same eye and pull the thread under the chin (where you started inserting the needle). Leave 1 stitch gap and repeat the process with the other eye, pulling the thread tight to create the shaping. Fasten off the thread and hide the end inside the toy.
- Eyes: Embroider highlights on the outer sides of the eyes using yellow thread.
- Eyelids: Use green yarn to embroider eyelids.
- Eyelashes: Embroider eyelashes with black yarn.
- Nose: Embroider a nose with black yarn at the level of the eyes.
- Mouth: Embroider the mouth with black yarn, referencing the photo.
- Eyebrows: Embroider eyebrows using two strands of green yarn.
- Hair: Make the Grinch’s hair using small green yarn pieces. Attach them by creating a loop with the yarn and securing it with a slip stitch into the magic ring. Use a needle to fluff the yarn out.
Optionally, you can replace the hair with a ribbon, string, or any other decorative element.
Your mini Grinch keychain is now ready!
This is a complete guide to crocheting the Mini Grinchmas decoration. Enjoy crafting this adorable holiday toy!