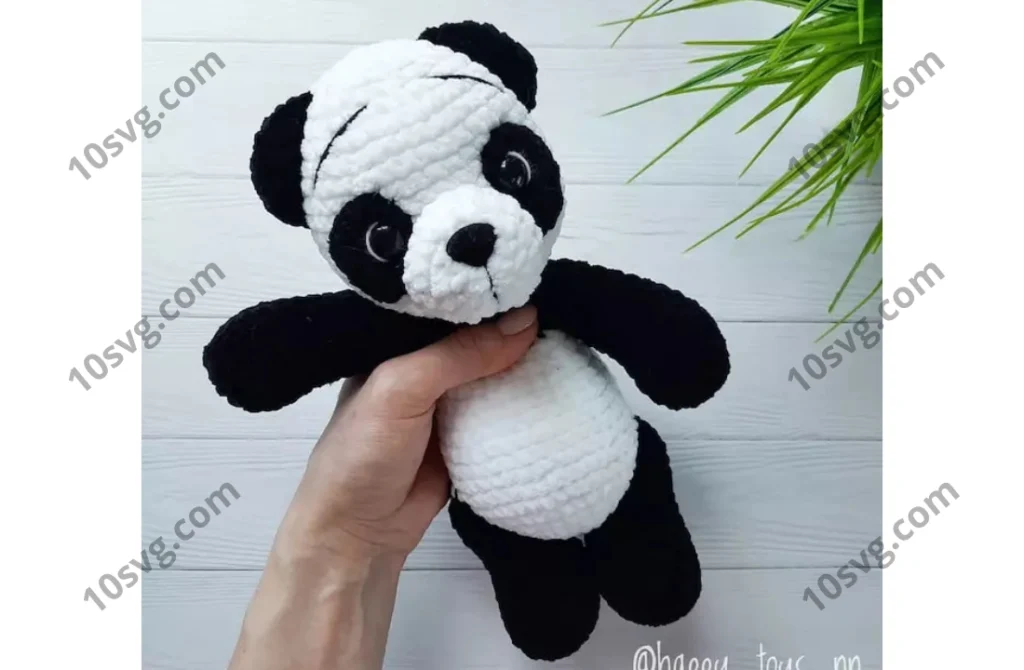
Body
Start crocheting the body with white yarn.
- 6 sc in KA (6)
- 6 inc (12)
- (1 sc, inc) x 6 (18)
- (2 sc, inc) x 6 (24)
- (3 sc, inc) x 6 (30)
- (4 sc, inc) x 6 (36)
- (5 sc, inc) x 6 (42)
8-12. 42 sc (5 rows) - 12 sc, dec, (6 sc, dec) x 2, 12 sc (39)
- 12 sc, dec, (5 sc, dec) x 2, 11 sc (36)
- 12 sc, dec, (3 sc, dec) x 2, 12 sc (33)
- 12 sc, dec, (2 sc, dec) x 2, 11 sc (30)
Change yarn to black.
- (3 sc, dec) x 6 (24)
18-19. 24 sc (2 rows) - (2 sc, dec) x 6 (18)
21-22. 18 sc (2 rows)
Stuff the body with filler. Secure the yarn and hide.
Ears (2 parts)
Crochet the ears with black yarn.
- 6 sc in KA (6)
- 6 inc (12)
- 12 sc
- Fold the ears in half, crochet 6 sc through both sides.
Secure the yarn and cut, leaving a long tail for sewing. Attach the ears to the head.
Legs (2 parts)
- Chain 6, insert a marker in the 6th chain (to mark the start).
- Inc in the 2nd chain from the hook, 3 sc, 3 sc in the next chain (last chain in the chain), 3 sc back across the chain (12)
- 3 inc, 3 sc, inc, 1 sc, inc, 3 sc (17)
The first increase in row 3 must be made in the stitch where the marker is inserted (this marks the start of the row).
- (inc, 1 sc) x 3, (3 sc, inc) x 2, 3 sc (22)
5-6. 22 sc (2 rows) - (dec, 2 sc) x 2, dec, 12 sc (19)
- (1 sc, 2 dec) x 2, 9 sc (15)
- 1 sc, 3 dec, 8 sc (12)
10-15. 12 sc (6 rows)
Begin stuffing the leg. Insert joints if desired.
- 6 dec (6)
Stuff the leg fully and tighten the opening. Secure the yarn and hide. Crochet the second leg similarly.
Arms (2 parts)
- 6 sc in KA (6)
- 6 inc (12)
- (3 sc, inc) x 3 (15)
4-5. 15 sc (2 rows) - 3 dec, 9 sc (12)
7-12. 12 sc (6 rows)
Start stuffing the arm.
- (2 sc, dec) x 3 (9)
- 9 sc
Insert joints if desired.
- (1 sc, dec) x 3 (6)
Stuff the arm fully, tighten the opening, and secure the yarn.
Tail
- 6 sc in KA (6)
- 6 inc (12)
3-4. 12 sc (2 rows)
Secure the yarn and cut, leaving a long tail for sewing.
Assembling the Toy
- Attach the head to the body.
- Attach the arms and legs (or secure the joints before attaching the head).
- Insert the nose into the snout between rows 2-3. Sew the snout onto the head between rows 11-15.
- Sew the eye spots onto the head, directly above the snout (on the sides).
- Embroider the eyebrows.
- Attach the tail between rows 7-10.
Your new plush panda is ready!
Pages: 1 2