Upper Legs (2 parts)
- Make 6 chain stitches in a magic ring.
- Row 1: 6 sc (12)
- Rows 2-7: 12 sc (6 rows)
- Row 8: dec, 10 sc (11)
- Rows 9-19: 11 sc (11 rows)
Cut the yarn and leave a tail for sewing.
Ears (2 parts)
- Make 4 chain stitches in a magic ring.
- Row 1: (1 sc, inc) x 2 (6)
- Row 2: 2 sc, inc x 2 (8)
- Row 3: (3 sc, inc) x 2 (10)
- Row 4: (4 sc, inc) x 2 (12)
- Rows 6-8: 12 sc (3 rows)
Cut the yarn and leave a tail for sewing.
Snout
- Make 6 chain stitches in a magic ring.
- Row 1: 6 sc (12)
- Row 2: (1 sc, inc) x 6 (18)
- Row 3: (2 sc, inc) x 6 (24)
- Row 4: 11 sc, ss
Tail
- Make 6 chain stitches in a magic ring.
- Row 1: 6 sc (12)
- Rows 3-23: 12 sc (21 rows)
- Row 24: fold together and crochet 6 sc
Assembling and Decorating the Toy
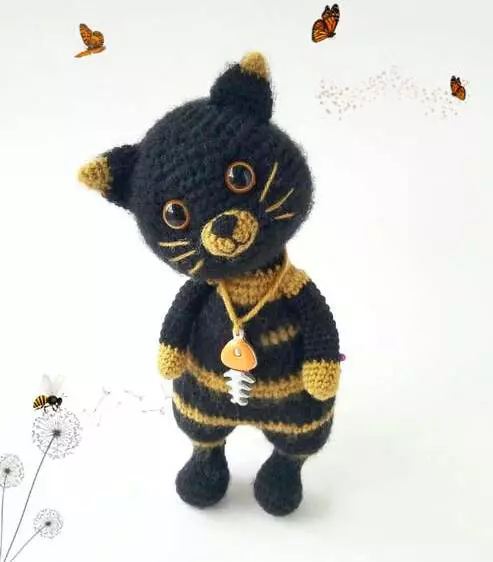
- Place the eyes between rows 10-11.
- Sew the snout between rows 12-16, adding stuffing.
- Embroider the nose, mouth, and whiskers.
- Sew the body and head together.
- Shape the cat’s snout.
- Move the ears and choose a suitable position for sewing them.
- Attach the upper legs to the sides of the body.
- Attach the tail along the center of the back, between rows 23-24.
- If the yarn is fluffy, you can brush the cat. I use a piece of Velcro for brushing, which is used for clothing fasteners.
Now your Sylvester the Cat is ready! Kiss it on the nose and give it a name. Enjoy your crocheted creation!