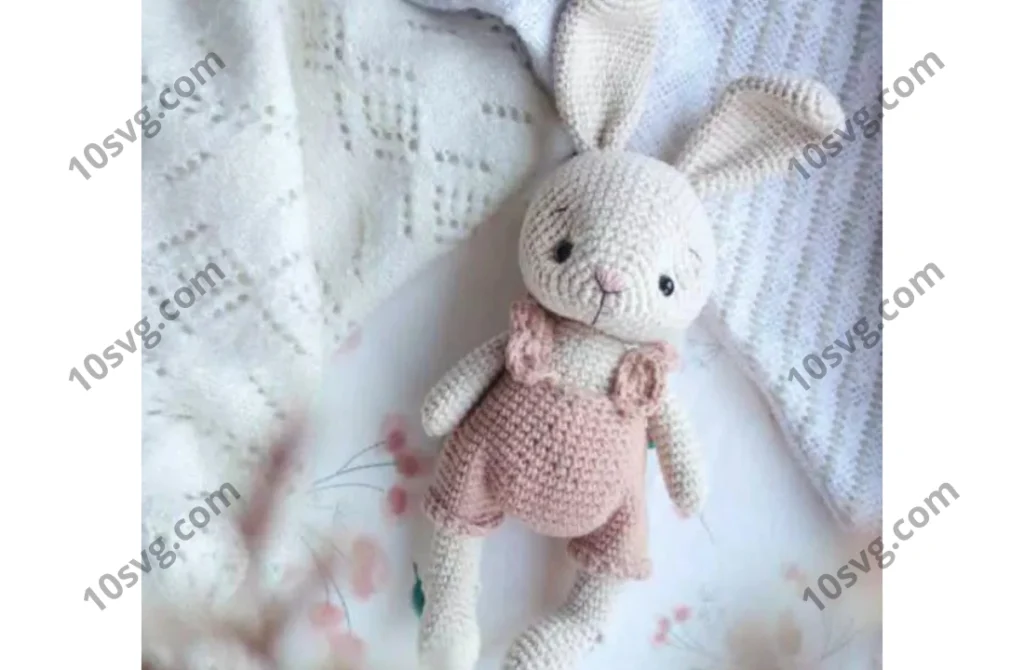
Face Embellishment
Place markers between rows 7 and 8, centered between the eyes. This is where the mouth will be.
Thread a needle with the yarn and pass it through the first point, then go through both eyes and exit at the second point. Tighten the yarn and tie a knot, shaping the indentation of the mouth.
Use pink embroidery thread to stitch the nose, following the instructions below. For the nose outline, use black thread. Stitch the eyebrows between rows 10 and 11. The width of the eyebrows is 2 stitches, and the distance between them is 14 stitches.
Ears (2 Pieces)
- Crochet Hook: 2.5 mm
- Yarn: Ecru color
Start with a magic ring (MR):
- 6 sc in MR (6)
- inc x 6 (12)
- (1 sc, 1 inc) x 6 (18)
- 18 sc (18)
- (5 sc, 1 inc) x 3 (21)
6-7. 21 sc (21) - (6 sc, 1 inc) x 3 (24)
9-11. 24 sc (24) - (10 sc, 1 dec) x 2 (22)
13-14. 22 sc (22) - (9 sc, 1 dec) x 2 (20)
- (8 sc, 1 dec) x 2 (18)
17-18. 18 sc (18) - (7 sc, 1 dec) x 2 (16)
20-21. 16 sc (16) - (6 sc, 1 dec) x 2 (14)
- 14 sc (14)
Cut the yarn, secure it, leaving a long tail for sewing.
Arms (2 Pieces)
- Crochet Hook: 2.5 mm
- Yarn: Ecru color
Start with a magic ring (MR):
- 6 sc in MR (6)
- inc x 6 (12)
3-15. 12 sc (13 rows) (12)
Stuff the arm. Cut the yarn, secure it, and leave a long tail for sewing. Fold the arm and sew the hole closed with a needle.
Legs (2 Pieces)
- Crochet Hook: 2.5 mm
- Yarn: Ecru color
Start with a magic ring (MR):
- 6 sc in MR (6)
- inc x 6 (12)
- 12 sc (12)
- (2 sc, 1 inc) x 4 (16)
5-7. 16 sc (3 rows) (16) - (2 sc, 1 dec) x 4 (12)
9-10. 12 sc (2 rows) (12)
Now, begin crocheting back-and-forth to form the heel:
6 sc, ch 1, turn
6 sc, ch 1, turn
6 sc, ch 1, turn
6 sc, ch 1, turn
6 sc (do not turn!)
- 6 sc
Now, continue crocheting in the first stitch of the previous row to form the round shape.
12-24. 12 sc (13 rows)
Stuff the detail. Cut the yarn, secure it, and leave a long tail for sewing. Fold the detail and sew the hole closed with a needle.
Body
- Crochet Hook: 2.5 mm
- Yarn: Ecru color
Start with a magic ring (MR):
- 6 sc in MR (6)
- inc x 6 (12)
- (1 sc, 1 inc) x 6 (18)
- (2 sc, 1 inc) x 6 (24)
- (3 sc, 1 inc) x 6 (30)
- (4 sc, 1 inc) x 6 (36)
- (5 sc, 1 inc) x 6 (42)
- (6 sc, 1 inc) x 6 (48)
9-12. 48 sc (4 rows) (48) - (6 sc, 1 dec) x 6 (42)
- 42 sc (42)
- (5 sc, 1 dec) x 6 (36)
- 36 sc (36)
- (4 sc, 1 dec) x 6 (30)
- 30 sc (30)
- (3 sc, 1 dec) x 6 (24)
20-21. 24 sc (2 rows) (24) - (2 sc, 1 dec) x 6 (18)
Do not stuff yet. We will stuff it while assembling the bunny. Cut the yarn, secure it, leaving a long tail for sewing.
Onesie
- Crochet Hook: 2.5 mm
Part 1 – Legs
- Yarn: Mocha color
- Chain 18, join into a ring with a slip stitch. 18 sc
2-4. 18 sc (3 rows)
Secure the yarn, cut it. Crochet the second leg the same way, but do not cut the yarn, continue crocheting.
Part 2 – Main Body
- Yarn: Mocha color
- Join the two legs. Chain 9, join the first leg and crochet 18 sc, then 9 sc on the chain, 18 sc on the first leg, and 9 sc on the other side of the chain (54).
- 54 sc (54)
- 18 sc, 1 inc, 3 sc, 1 inc, 3 sc, 1 inc, 18 sc, 1 inc, 3 sc, 1 inc, 3 sc, 1 inc (60)
4-7. 60 sc (4 rows) (60) - (8 sc, 1 dec) x 6 (54)
- 54 sc (54)
- (7 sc, 1 dec) x 6 (48)
- 48 sc (48)
- (6 sc, 1 dec) x 6 (42)
- 42 sc (42)
- (5 sc, 1 dec) x 6 (36)
15-16. 36 sc (2 rows) (36) - (4 sc, 1 dec) x 6 (30)
- 30 sc (30)
Cut the yarn.
Part 3 – Straps
Option 1
- Yarn: Mocha color
- Chain 12 + 1 ch, turn (12)
- 12 sc + 1 ch, turn (12)
- (2 hdc, 1 ch, 2 hdc, 1 sl st) x 4 + 1 ch, turn (24)
- (5 hdc, 1 sl st) x 4 (24 sc)
Cut the yarn, secure it, and leave a long tail for sewing.
Option 2
- Yarn: Mocha color
- Chain 15 + 1 ch, turn (15)
- 15 sc (15)
Cut the yarn, secure it, and leave a long tail for sewing.
Assembly and Final Touches
- Slightly stuff the body to make it easier to put on the onesie.
- Attach the legs between rows 8 and 9 of the body.
- Sew the arms two rows below the neck.
- Put the onesie on the bunny.
- Use pins to secure the straps, then sew them on.
- Finally, stuff the body.
- Attach the ears between rows 20 and 21 of the head, with 6 stitches between them.
- Attach the head to the body, between rows 10-16 of the head.