Ears (2 pieces) (Do not stuff the ears):
- 6 sc in MR – 6 sc
- 6 inc – 12 sc
- (1 sc, inc) x 6 – 18 sc
- 18 sc for 1 round – 18 sc
- (5 sc, inc) x 3 – 21 sc
- (6 sc, inc) x 3 – 24 sc
7-8. 24 sc for 2 rounds – 24 sc - (7 sc, inc) x 3 – 27 sc
10-12. 27 sc for 3 rounds – 27 sc - (7 sc, dec) x 3 – 24 sc
14-15. 24 sc for 2 rounds – 24 sc - (6 sc, dec) x 3 – 21 sc
17-22. 21 sc for 6 rounds – 21 sc - (5 sc, dec) x 3 – 18 sc
24-28. 18 sc for 5 rounds – 18 sc - (4 sc, dec) x 3 – 15 sc
- 15 sc for 1 round – 15 sc
- Fold the ear in half and crochet 7 sc through both sides. Weave in the yarn ends.
Tail:
- 6 sc in MR – 6 sc
- 6 inc – 12 sc
- (1 sc, inc) x 6 – 18 sc
- (1 sc, dec) x 6 – 12 sc
- 6 dec – 6 sc
- Fold the tail in half and crochet 3 sc through both sides. Weave in the yarn ends.
Body:
Crochet the body from the bottom to the top, stuffing as you go:
- 6 sc in MR – 6 sc
- 6 inc – 12 sc
- (1 sc, inc) x 6 – 18 sc
- (2 sc, inc) x 6 – 24 sc
- (3 sc, inc) x 6 – 30 sc
- (4 sc, inc) x 6 – 36 sc
- 36 sc for 1 round – 36 sc
- (5 sc, inc) x 6 – 42 sc
- Join the hind legs in the next round:
When you reach the place to join the legs, insert the hook first into the loops of the leg, then into the loops of the body, pull the thread, and crochet sc. Crochet all 6 stitches on the leg with the body stitches.
Repeat the same for the second leg.
- 42 sc (body and legs) – 42 sc
- 42 sc for 1 round – 42 sc
- Join the tail in the next round:
Insert the tail into the body at the back center, between the hind legs. Crochet 3 stitches of the tail together with the body.
- 42 sc (body and tail) – 42 sc
- 42 sc for 1 round – 42 sc
- (5 sc, dec) x 6 – 36 sc
- 36 sc for 1 round – 36 sc
- (4 sc, dec) x 6 – 30 sc
- 30 sc for 1 round – 30 sc
- (3 sc, dec) x 6 – 24 sc
- 24 sc for 1 round – 24 sc
- (2 sc, dec) x 6 – 18 sc
- Stuff the body with fiberfill.
- Join the forelegs the same way as you joined the hind legs. The forelegs should align with the hind legs. Make adjustments if necessary to keep the forelegs aligned with the hind legs.
- 18 sc (body and forelegs) – 18 sc
- (1 sc, dec) x 6 – 12 sc
- Stuff the body with fiberfill.
- Continue crocheting the head.
Head:
- 12 inc – 24 sc
- (1 sc, inc) x 12 – 36 sc
- (5 sc, inc) x 6 – 42 sc
25-30. 42 sc for 6 rounds – 42 sc
- Insert safety eyes between rounds 29 and 30, with 4-5 stitches between them.
- (5 sc, dec) x 6 – 36 sc
- 36 sc for 1 round – 36 sc
- (4 sc, dec) x 6 – 30 sc
- 30 sc for 1 round – 30 sc
- (3 sc, dec) x 6 – 24 sc
- Attach the ears to the head in the same way as you did with the hind legs/forelegs, crocheting the ears with the head stitches.
- 24 sc (head and ears) – 24 sc
- (2 sc, dec) x 6 – 18 sc
- 18 sc for 1 round – 18 sc
- (1 sc, dec) x 6 – 12 sc
- Stuff the head with fiberfill.
- Cut the thread and fasten it off. Pull the hole closed and hide the yarn ends inside the piece.
Assembly and Decoration
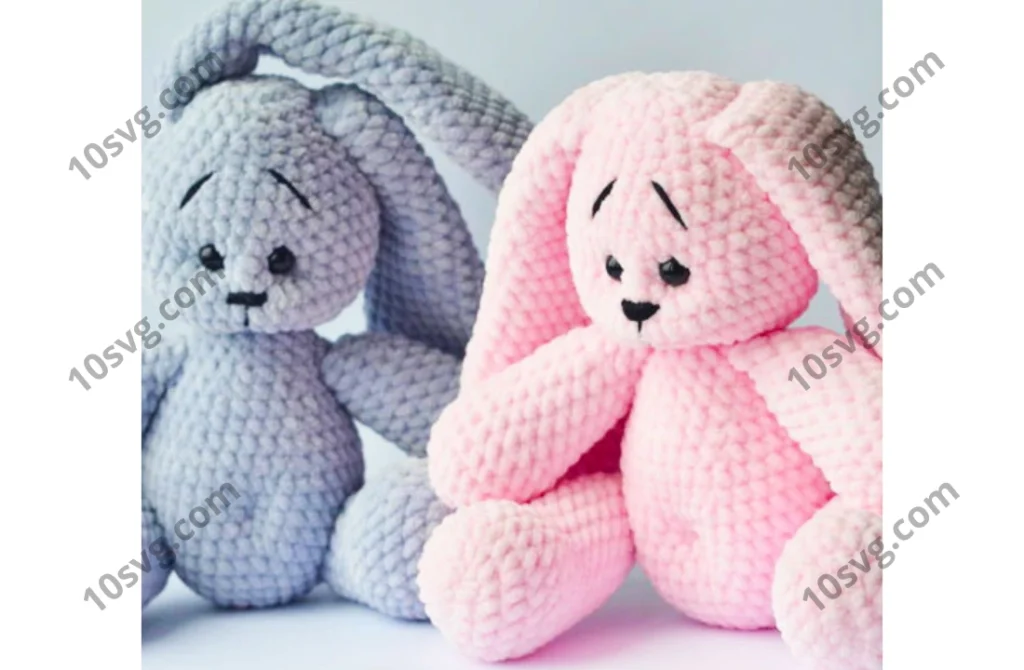
Once you have completed crocheting the Chubby Bunny Lolly, it’s time to give your bunny its final touches, including decorating the muzzle and adding features like the nose and eyebrows. Here’s a step-by-step guide to decorating your bunny:
Needle Sculpting for the Muzzle:
- Right Side of the Muzzle:
- Insert your needle at the bottom of the muzzle, then exit through the outside of the right eye.
- Move a few stitches to the side and insert the needle at the inner corner of the right eye. Exit the needle through the bottom of the muzzle.
- Repeat Step 1 slightly tightening the thread by pulling both ends gently.
- Left Side of the Muzzle:
- Insert the needle at the bottom of the muzzle and exit it through the outside of the left eye.
- Move a few stitches to the side and insert the needle at the inner corner of the left eye. Exit the needle through the bottom of the muzzle.
- Tighten the threads on both sides and tie a knot at the bottom of the muzzle to secure the threads.
- Weave in the thread ends inside the piece to hide them.
Embroidering the Nose and Eyebrows:
- Use black yarn to embroider a small nose in the center of the muzzle.
- Create a slight line from the nose down the center of the muzzle to define the bunny’s snout.
- Embroider eyebrows above the safety eyes to add some personality to the face.
- Hide any remaining thread ends inside the toy.
Needle Sculpting for the Tummy (Navel):
- Insert the needle under the tail and exit it through the center of the tummy.
- Move a few stitches to the side and insert the needle again into the tummy, exiting under the tail.
- Repeat this process one more time to give the tummy a subtle sculpted effect.
- Tighten the threads and secure them by tying a knot under the tail.
- Hide the thread ends inside the body.
Final Steps:
Now your plush bunny is complete! The cute needle-sculpted features, embroidered face, and tummy details make your Chubby Bunny Lolly truly special.
Thank you for crocheting along with me!
I hope the instructions were clear and that you enjoyed the process. Please respect my work and credit me as the author (@mommys_joy_by Anna Vasilyeva) when sharing your completed bunny.
Happy crocheting, and thank you for supporting my design!