Ears (Make 2):
- R 1: 8 sc in magic ring (8)
- R 2-3: 8 sc (2 rows)
- Sl st and leave a long tail for sewing.
Body:
- R 1: 6 sc in magic ring (6)
- R 2: (inc) repeat 6 times (12)
- R 3: (1 sc, inc) repeat 6 times (18)
- R 4: (2 sc, inc) repeat 6 times (24)
- R 5: (3 sc, inc) repeat 6 times (30)
- R 6: BLO 30 sc
- R 7-11: 30 sc (5 rows)
- R 12: (3 sc, dec) repeat 6 times (24)
- R 13: 24 sc
- R 14: (2 sc, dec) repeat 6 times (18)
- R 15: 18 sc
- Stuff the body.
- Sl st and fasten off.
Arms (With brown Vita Coco yarn):
Big Part (Make 2):
- R 1: 7 sc in magic ring (7)
- R 2-7: 7 sc (6 rows)
- Sl st and leave a long tail for sewing.
Small Part (Make 2):
- R 1: 6 sc in magic ring (6)
- R 2-3: 6 sc (2 rows)
- Sl st and leave a long tail for sewing.
Assembly of Arms:
- Sew the small part to the big part (this will be the hand).
Scarf (With red yarn):
- Make 32 ch.
- From the 3rd ch from the hook, hdc into each st to the end.
- Fasten off.
Nose:
- Embroider a small nose on the face using black embroidery floss (or black yarn). You can position it just below the eyes.
Assembling the Toy:
- Attach the head: Sew the head to the body.
- Position and sew the ears onto the head.
- Sew the arms to the sides of the body.
- Add the scarf: Wrap the scarf around the neck and sew it in place.
- Add the eyes: Insert the 6 mm safety eyes into the head.
- Embroider the nose with black embroidery floss.
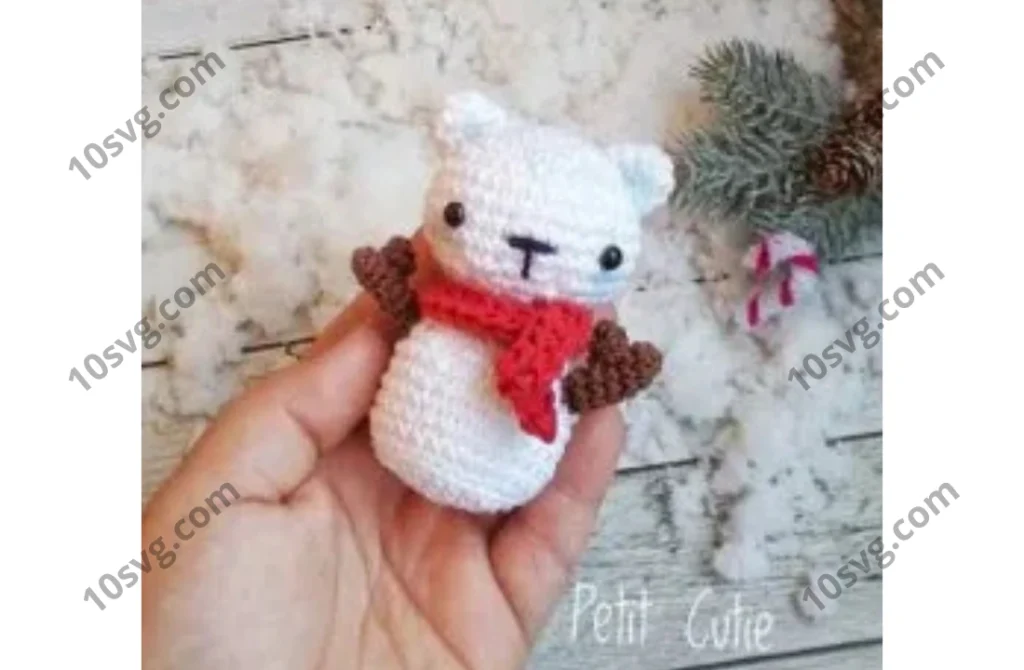
Your Amigurumi Snowman Bear is now complete and ready to enjoy! This sweet bear is perfect for winter holidays or as a cozy little gift. Happy crocheting!
Pages: 1 2