Body
On the body, I used two colors. With the exception of the last round, I changed colors every 3 rounds, as shown below.
Attention: Do not forget to stuff the body as you crochet.
Start with color 1
1) 6 sc in the mr (6)
2) 6 inc (12)
3) [1 sc, 1 inc] x6 (18)
Change to color 2
4) [2 sc, 1 inc] x6 (24)
5) [3 sc, 1 inc] x6 (30)
6) [4 sc, 1 inc] x6 (36)
Change to color 1
7 to 9) sc around (36)
Change to color 2
10 and 11) sc around (36)
12) [4 sc, 1 dec] x6 (30)
Change to color 1
13) sc around (30)
14) [3 sc, 1 dec] x6 (24)
15) sc around (24)
Change to color 2
16) [2 sc, 1 dec] x6 (18)
17) sc around (18)
18) [1 sc, 1 dec] x6 (12)
Change to color 1
19) sc around (12)
Fasten off and leave a long thread. Sew the head onto the body, ensuring the head is well-positioned. Keep stuffing the body/neck as you sew. It should be firmly stuffed. Fasten off and hide the tail inside the body.
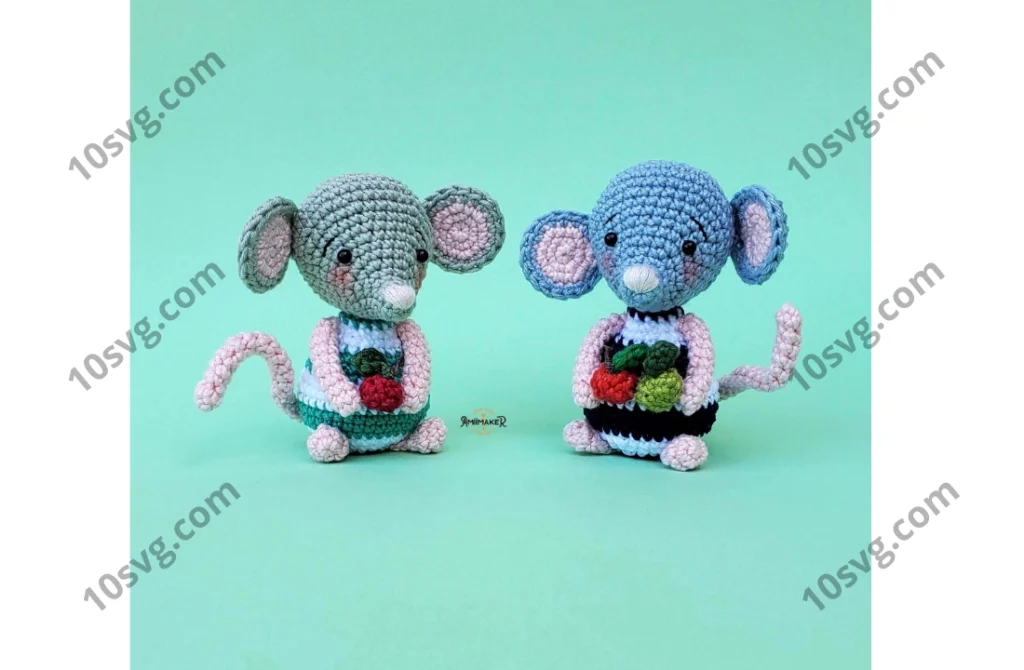
Ears
The ears are formed from two circles that are crocheted together at the end. We will crochet four pieces, two of each color. They do not need to be stuffed. Use the color chosen to crochet the inside part of the ears. Make two. I used pink yarn.
1) 6 sc in the mr (6)
2) 6 inc (12)
3) [1 sc, 1 inc] x6 (18)
Fasten off.
Use the same color chosen for the head. Make two.
1) 6 sc in the mr (6)
2) 6 inc (12)
3) [1 sc, 1 inc] x6 (18)
Do not fasten off. Taking the pink part, join the two pieces together and crochet a round of hdc around them (18). The idea is to sew both parts together, creating only one piece. Note: the ears should be crocheted together with the wrong sides facing each other. Fasten off leaving a long thread. Sew the ears between rounds 15 and 16 of the head, on the side.
Arms
Use the color chosen for the arms.
Make two. They don’t need to be stuffed.
1) 6 sc in the mr (6)
2 to 10) sc around (6)
Fasten off and leave a long thread for sewing. Sew the arms between rounds 16 and 18 of the body.
Feet
Use the color chosen for the feet. Make two. They don’t need to be stuffed.
1) 5 sc in the mr (5)
2) 5 inc (10)
3) sc around (10)
4) 5 dec (5)
5) Flatten the opening and sc through both layers (2)
Fasten off, leaving a long thread for sewing. The feet should be sewn between rounds 4 and 5 of the body, leaving approximately 6 stitches between them.
Note: your little mouse should stand by itself. If you want, you can use a little bit of fabric glue or sew a few stitches so the feet are well attached to the body.
Tail
The tail is a kind of boring piece to crochet, as it is thin and has a wire inside (optional). But do not be discouraged; it does not take long to make as the final result is fun and gives the mouse some personality.
It doesn’t have to be stuffed. Instead, we are going to use a thin wire that can be covered only on its tips (I folded mine in half). If necessary, adjust the wire size before fastening it off.
Note: put the wire inside the tail once you reach round 10 and keep crocheting around it.
Use the color chosen for the tail.
1) 4 sc in the mr (4)
2 to 21) sc around (4)
22) Flatten the opening and sc through both layers (2)
Fasten off leaving a long thread. Sew the tail onto the body between rounds 6 and 7, as shown below. Don’t cut the yarn tail. We will use it to sew the tail again between rounds 7 and 8 of the body and 19 and 20 of the tail. Tie a knot to make the tail firm and fasten off the thread. Shape the tail as you wish.
Apples
This little mouse is very hungry and loves to eat apples. Crochet as many as you’d like and be creative with your colors. In addition to the colors used in the apple, you will need a small piece of brown thread for the twig/stem.
Use the color chosen for the apple.
1) 5 sc in the mr (5)
2) 5 inc (10)
3) sc around (10)
4) 5 dec (5)
Stuff the apple with a little bit of fiber. Close the hole and fasten off the yarn tail.
Use the color chosen for the little leaf. Ch 4.
1) From the second ch from hook: 1 sl st, 1 sc, 2 hdc in the last ch. On the other side of the ch: 1 sc, 1 sl st. Fasten off and leave a long thread for sewing.
Sew in the center of the apple, right in the center of the magic ring. Secure tightly with two knots. Finish off and cut all the yarn tails. For the twig/stem, cut a 7-inch (15 cm) piece of brown yarn. Pass the thread through two different stitches at the bottom of the apple (in the center – at the opposite side of the magic ring) and exit with both ends through the hole in the magic ring. Tie two knots to flatten it slightly, giving your apple some shape. Pass a little bit of glue on both ends (those that came out of the magic ring hole) squeezing them
to secure.
Finishing Touches
Your little mouse is ready! You can add a little blush on the cheeks for a cute touch. Use a small brush or cotton swab to apply makeup. You can also add accessories like a little scarf or bow.
I hope you enjoy crocheting this adorable little mouse! Happy crafting!