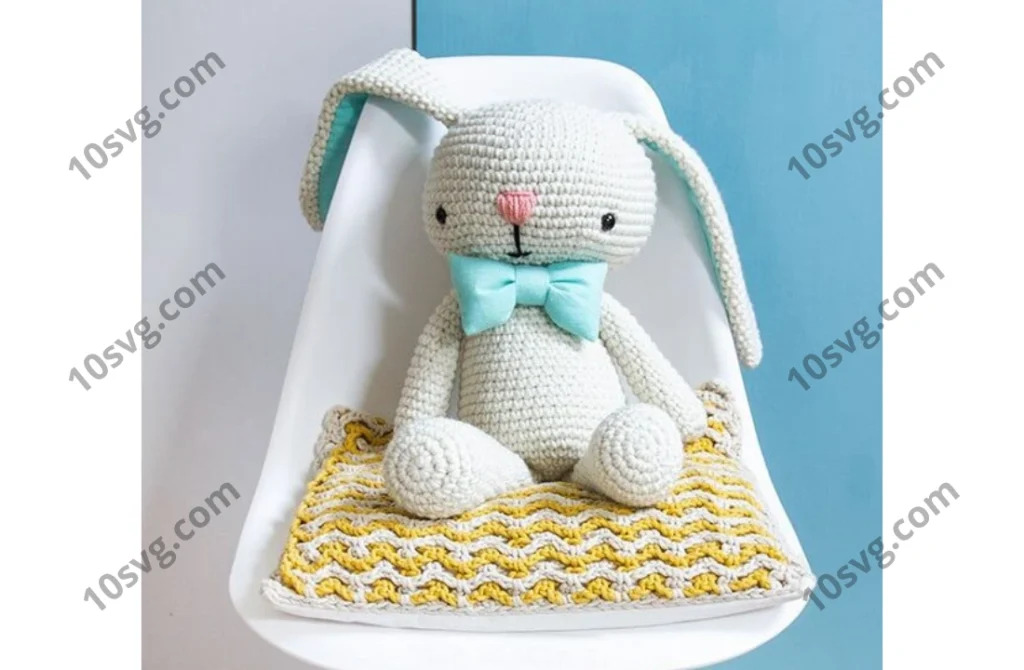
Ear (Make 2)
- Rnd 1: Start 6 sc in a magic ring [6]
- Rnd 2: (inc, sc in next 2 st) repeat twice [8]
- Rnd 3: (inc, sc in next 3 st) repeat twice [10]
- Rnd 4: (inc, sc in next 4 st) repeat twice [12]
- Rnd 5: (inc, sc in next 5 st) repeat twice [14]
- Rnd 6: (inc, sc in next 6 st) repeat twice [16]
- Rnd 7 – 21 (15 rounds): sc in each st around [16]
- Rnd 22: dec, sc in next 14 st [15]
- Rnd 23: sc in each st around [15]
- Rnd 24: dec, sc in next 13 st [14]
- Rnd 25: sc in each st around [14]
- Rnd 26: dec, sc in next 12 st [13]
- Rnd 27: sc in each st around [13]
- Rnd 28: dec, sc in next 11 st [12]
- Rnd 29: sc in each st around [12]
- Rnd 30: dec, sc in next 10 st [11]
- Rnd 31: sc in each st around [11]
- Rnd 32: dec, sc in next 9 st [10]
- Rnd 33: sc in each st around [10]
- Do not stuff.
- Fasten off leaving a long tail for sewing the ears between rounds 6 and 8 of the head.
- For the inner ears, cut two pieces from the flannel fabric using the template.
- Sew the inner ear in place using sewing thread.
Body
- Rnd 1: Start 6 sc in a magic ring [6]
- Rnd 2: Inc 6 times [12]
- Rnd 3: (inc, sc in next st) repeat 6 times [18]
- Rnd 4: (inc, sc in next 2 st) repeat 6 times [24]
- Rnd 5: (inc, sc in next 3 st) repeat 6 times [30]
- Rnd 6: (inc, sc in next 4 st) repeat 6 times [36]
- Rnd 7: (inc, sc in next 5 st) repeat 6 times [42]
- Rnd 8: (inc, sc in next 6 st) repeat 6 times [48]
- Rnd 9 – 13 (5 rounds): sc in each st around [48]
- Rnd 14: (dec, sc in next 6 st) repeat 6 times [42]
- Rnd 15 – 17 (3 rounds): sc in each st around [42]
- Rnd 18: (dec, sc in next 5 st) repeat 6 times [36]
- Rnd 19 – 21 (3 rounds): sc in each st around [36]
- Rnd 22: (dec, sc in next 4 st) repeat 6 times [30]
- Rnd 23 – 25 (3 rounds): sc in each st around [30]
- Rnd 26: (dec, sc in next 3 st) repeat 6 times [24]
- Stuff the body using toy stuffing.
- Fasten off leaving a long tail for sewing the body to the head.
Leg (Make 2)
- Rnd 1: Start 6 sc in a magic ring [6]
- Rnd 2: Inc 6 times [12]
- Rnd 3: (inc, sc in next st) repeat 6 times [18]
- Rnd 4: (inc, sc in next 2 st) repeat 6 times [24]
- Rnd 5 – 9 (5 rounds): sc in each st around [24]
- Rnd 10: (dec, sc in next 6 st) repeat 3 times [21]
- Rnd 11: sc in each st around [21]
- Rnd 12: (dec, sc in next 5 st) repeat 3 times [18]
- Rnd 13 – 15 (3 rounds): sc in each st around [18]
- Rnd 16: (dec, sc in next 4 st) repeat 3 times [15]
- Rnd 17 – 19 (3 rounds): sc in each st around [15]
- Rnd 20: (dec, sc in next 3 st) repeat 3 times [12]
- Rnd 21 – 23 (3 rounds): sc in each st around [12]
- Rnd 24: (dec, sc in next 2 st) repeat 3 times [9]
- Rnd 25 – 27 (3 rounds): sc in each st around [9]
- Stuff slightly using toy stuffing.
- Fasten off leaving a long tail for sewing the legs to the body.
Tail
- Make a 9 cm (3 ½ in) diameter pompom using a pompom maker.
- Sew the pompom to the back of the body.
Arm (Make 2)
- Rnd 1: Start 6 sc in a magic ring [6]
- Rnd 2: Inc 6 times [12]
- Rnd 3 – 9 (7 rounds): sc in each st around [12]
- Rnd 10: dec, sc in next 10 st [11]
- Rnd 11 – 12: sc in each st around [11]
- Rnd 13: dec, sc in next 9 st [10]
- Rnd 14 – 19 (6 rounds): sc in each st around [10]
- Stuff slightly using toy stuffing.
- Fasten off leaving a long tail for sewing the arms to the body.
Bow Tie
- Cut a rectangle 17 x 14 cm from the flannel fabric.
- Fold and sew the fabric to form the bow.
- Attach the bow to the body of the bunny.
Feel free to tag me (@freeamigurumii) in your photos on Instagram or Facebook if you’d like!
All Finished.