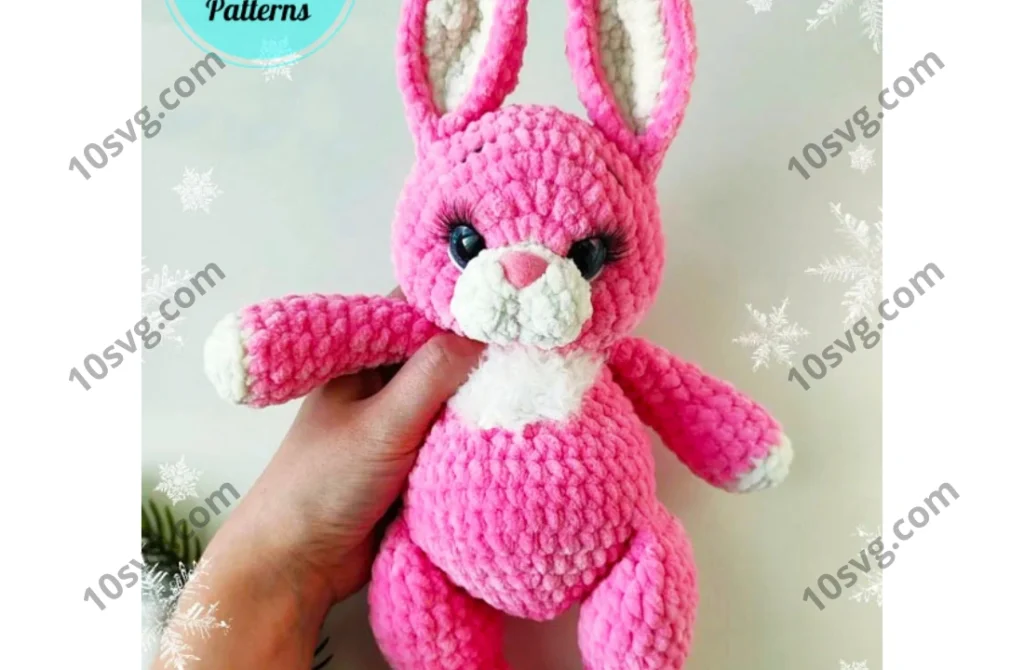
Plush Crochet Bunny Laia PDF Pattern
The bunny amigurumi pattern that I will share today is a very different and advanced level amigurumi toy. While making amigurumi toys, we can see that some tightening is done, especially in the muzzle area and eyes. In addition, the amigurumi bunny’s feet are made using two different colors and have a layered structure. The ears of the cute crochet bunny are combined in two different pieces after being crocheted. It’s a really nice design.
Amigurumi Pink Bunny Laia Free Pattern
The crochet bunny was translated from Russian to English by its designer, but there were a few points that needed correction, and I am publishing the updated version now. The toy looks really great, but I can easily say that it is for expert-level amigurumi lovers.
Designer: baloo_hand
Materials
- 1. Himalaya Dolphin Baby:
- Pink color No309.
- Milky color N0308.
- 2. YarnArt Mink N2330.
- 3. YarnArt Jeans – pink color for the eye sculpting, white and black for eyes.
- 4. Safety nose 15.13.
- 5. Safety eyes D=16 mm.
- 6. 4 mm crochet hook.
- 7. Stuffing material (fiberfill/polyester).
- 8. Other tools.
Abbreviations
- sc: Single Crochet
- inc: Increase
- dec: Decrease
- st: Stitch
- hdc: Half Double Crochet
- sl-st: Slip Stitch
- ch: Chain
Head
With milky yarn:
- Chain 5 and start crocheting in the 2nd chain from hook: 2inc, 2sc, 3sc in the last chain, 3sc (10)
- 2inc, 2sc, 3inc, 2sc, inc (16)
- 16sc (16)
- 16sc (16)
With pink yarn:
- 12inc, 4sc (28)
- 1sc, 3inc, 6sc, 4inc, 5sc, 3inc, 6sc (38)
- 4sc, 2inc, 10sc, (inc, 2sc) * 2, 8sc, inc, 8sc (42)
8-12. 42sc (42)
- Insert the eyes between rounds 5 and 6. The distance between the eyes is 14 sc.
- Insert the nose between rounds 2 and 3.
- 8sc, 3dec, 11sc, 3dec, 11sc (36)
- 6sc, (1dec, 1sc) * 3, 5sc, (1dec, 1sc) * 3, 7sc (30)
- (3 sc, 1dec) * 6 (24)
- (2 sc, 1dec) * 6 (18)
- (1 sc, 1dec) * 6 (12)
- 6 dec
Fasten off. Cut yarn and hide the tail.
- Use a long pink yarn (Yarn Art Jeans) for sculpting the muzzle and eye sockets.
- Insert the needle to the bottom of the head. Draw it out at the outer corner of the eye and insert it at the inner corner. Tighten firmly and draw the needle to the initial point. Fasten off. Repeat with the second eye similarly.
- Sculpt the muzzle using the same yarn. Insert the needle under the nose and draw it back to the bottom of the head. Tighten both ends firmly. Fasten off.
- Embroider the whites around the eyes with a thin white thread. Embroider the eyelids with a black thin thread. Embroider the eyebrows with a thin black thread.