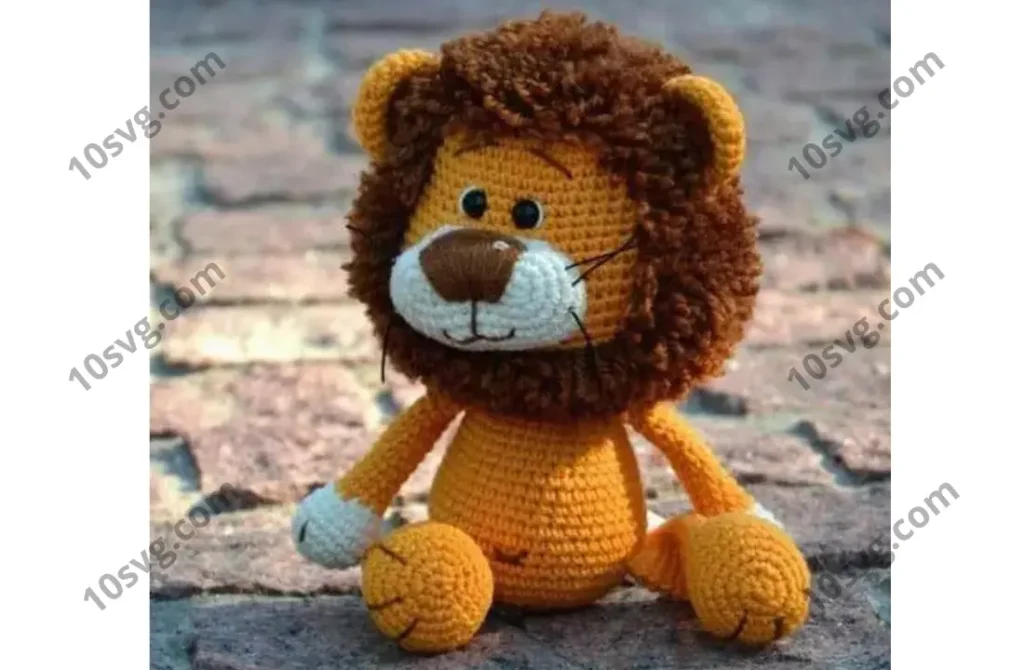
Free Masterclass on Crochet Lion
This masterclass teaches how to crochet a lion using amigurumi techniques. Suitable yarns for this project include acrylic, cotton, or semi-cotton yarn, with an appropriate crochet hook.
Materials and Tools:
- Yarn: Yellow, cream, brown, orange
- Crochet Hook
- Toy Eyes: 15 mm
- Toy Filler
- Needle for sewing parts
- Scissors
All necessary materials can be purchased here.
Symbols:
- KA – Magic ring
- vp – Chain stitch
- ss – Slip stitch
- sc – Single crochet
- dc2 – Double crochet with two yarn overs
- inc – Increase
- dec – Decrease
- BLO – Crochet in the back loop only
- (…) x n – Repeat n times
Instructions for Amigurumi Lion:
Hands and Feet Pads:
Instead of attaching separate pads for the hands and feet, you can start crocheting the cream-colored yarn for the hands with 1–3 rows and for the feet with 1–4 rows, then switch to yellow yarn for the remaining rows. While I prefer crocheting separate pads, crocheting them together is certainly easier.
Head Shaping:
Cut a 35 cm piece of yarn. Tie a strong knot at one end and thread the other through a yarn needle. Insert the needle into the back of the head and sew between two points where the eyes will be placed. Pull the yarn tight to create a dent. Tie a knot and hide the yarn tail inside the head.
Crochet Head:
- Yellow Yarn:
- 6 sc in KA (6)
- Inc in every stitch (12)
- (sc, inc) (18)
- sc, inc, (2 sc, inc) x 5, sc (24)
- (3 sc, inc) (30)
- 2 sc, inc, (4 sc, inc) x 5, 2 sc (36)
- (5 sc, inc) (42)
- 3 sc, inc, (6 sc, inc) x 5, 3 sc (48)
- (7 sc, inc) (54)
- 4 sc, inc, (8 sc, inc) x 5, 4 sc (60)
11-20. sc in each stitch (60) - 4 sc, dec, (8 sc, dec) x 5, 4 sc (54)
- (7 sc, dec) (48)
- 3 sc, dec, (6 sc, dec) x 5, 3 sc (42)
- (5 sc, dec) (36)
- 2 sc, dec, (4 sc, dec) x 5, 2 sc (30)
- Fill the head ¾ full. Place eyes and sew them between two points. Insert and secure the eyes.
- (3 sc, dec) (24)
- Complete filling and secure the opening with a long yarn tail.
Snout:
- Cream Yarn:
- Start with a chain of 5. Inc in the 2nd chain from the hook, 2 sc, 5 sc in the last chain. Work along the opposite side of the chain, 2 sc, 3 sc in the last chain (14)
- Inc, 4 sc, (inc) x 3, 4 sc, (inc) x 2 (20)
- Inc, 6 sc, (inc) x 2, sc, inc, 6 sc, (inc) x 2, sc (26)
- Inc, 8 sc, (inc, sc) x 2, inc, 8 sc, (inc, sc) x 2 (32)
- Inc, 10 sc, inc, 2 sc, inc, sc, inc, 10 sc, inc, 2 sc, inc, sc (38)
6-7. sc in each stitch (38) - sc in each stitch, last 3 stitches together (36)
Sew the snout to the head, ¾ of the way around, leaving a small opening for filling. Fill and finish sewing the remaining ¼ closed.